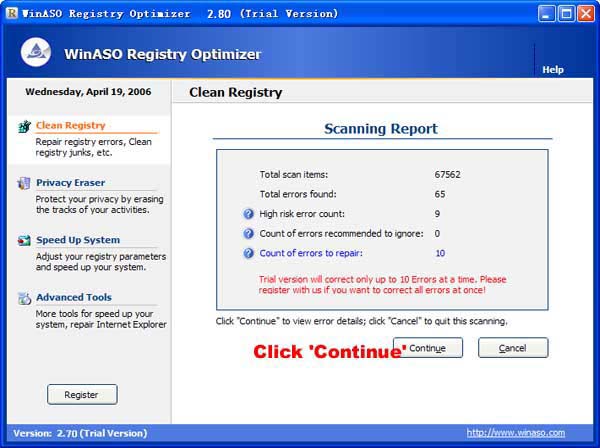
| Scanning your registry |
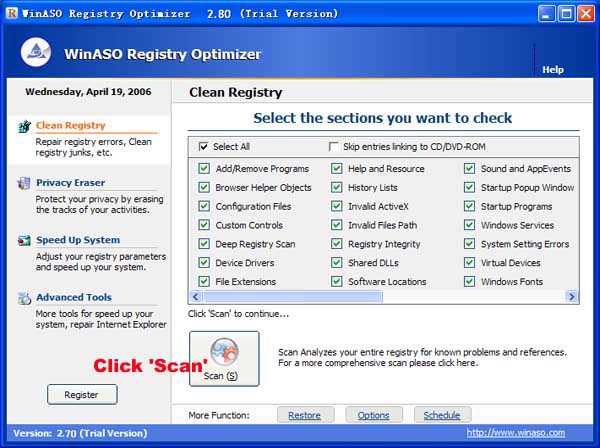
| To scan your registry, first make the sections you want to scan by
checking the boxes on the section list that correspond to the various sections
of the Windows registry and Shortcuts. The default option is to scan all
sections.
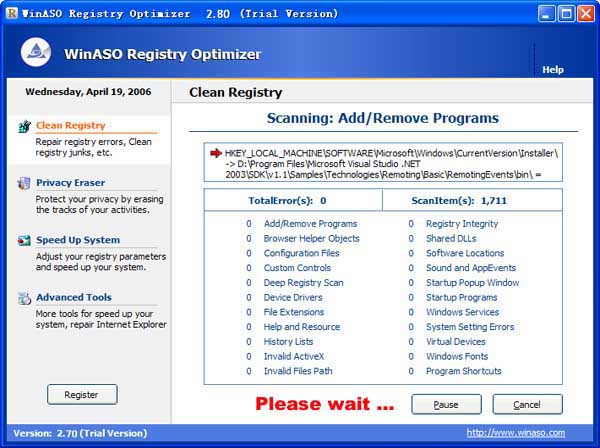
To begin the scan, click on the "Scan" button. During the scanning process you can pause or cancel the scan at any time by clicking the appropriate button. |
| Repairing your registry |
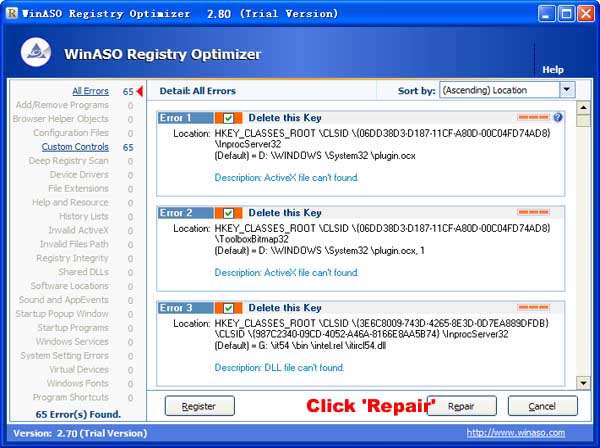
| Once the scan is completed you will be shown a list of problems
detected in your registry. You can either choose the entries to fix or choose
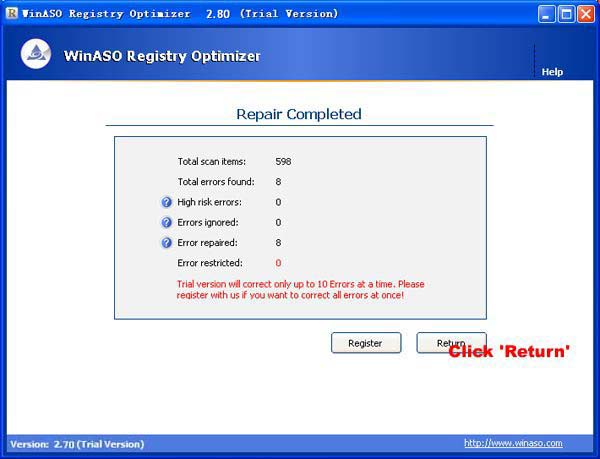
the default to select them all. Then you click "Repair" to fix the problems. A backup copy of the repair will be automatically saved so that it can be undone if necessary. |
| Please note only up to 10 errors will be repaired at one time in the evaluation version(TRIAL VERSION). Please register the software to enable the full function. |
| Restore |
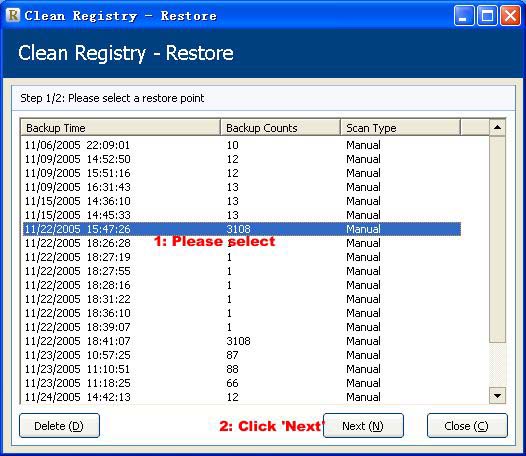
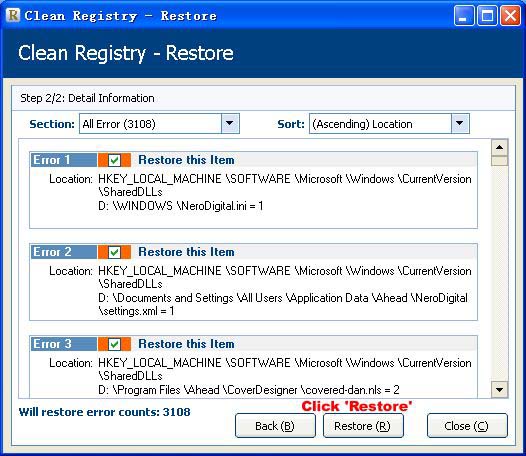
| If you want to restore any errors that have been previously
corrected you may do so by clicking "Restore" button . You will be shown
a new screen with a list of all the backups available.
To restore a backup, check the box next to the item to restore and click the "Restore" button. To delete any previous backups, check the boxes next to the items you would like to remove and click the "Delete" button. |
